
Why Knowing How to Check Your Thermostat Before Calling for Repair Can Save You Time and Money
Knowing how to check your thermostat before calling for repair could save you from an unnecessary service visit — and in many cases, the fix takes less than five minutes.
Here is a quick checklist to run through first:
- Check the batteries — replace them even if the screen looks active
- Check the circuit breaker — look for a tripped switch on the indoor HVAC unit
- Verify the mode — confirm the system is set to Heat or Cool, not Off
- Apply the 5-degree rule — set the temperature at least 5°F beyond the current room temperature to trigger a response
- Check the fan setting — make sure it is on Auto, not On
- Clean the thermostat — remove the cover and gently clear dust from the sensors
- Inspect the wiring — look for loose or corroded connections behind the faceplate
If none of those steps restore normal operation, there may be a deeper issue worth a professional look.
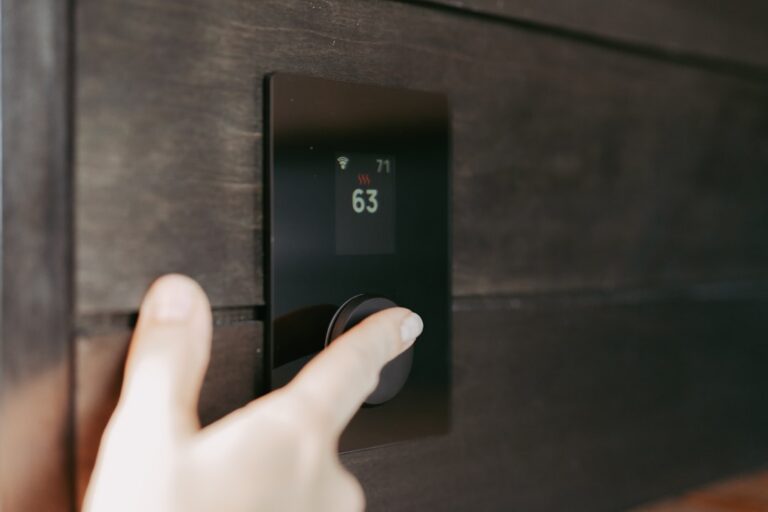
Your thermostat is the command center of your entire HVAC system. When it stops communicating with your furnace or air conditioner, even a perfectly functional unit becomes useless. Think of it like a brain that has lost its connection to the rest of the body — nothing moves, nothing responds, and the whole house suffers.
The good news is that roughly 25% of furnace repair calls turn out to be thermostat-related issues, many of which homeowners can resolve on their own. Dead batteries, a tripped breaker, or a dusty sensor are far more common culprits than a failed HVAC unit. Before you schedule a service call, a simple walk-through of your thermostat can tell you a lot.
This guide walks you through every step — from checking power and settings to cleaning sensors, testing wiring, and knowing when it really is time to call in a pro.

Common Signs of a Malfunctioning Thermostat
Before we dive into the “how-to,” let’s identify the “why.” How do you know the problem is actually the thermostat and not a mechanical failure deep inside your furnace? In our experience serving San Diego homeowners from Poway to Chula Vista, we see several recurring red flags.
Blank or Flickering Display
A blank screen is the most obvious sign of trouble. This usually indicates a power failure. If the screen is flickering or the text is so dim you can barely read it, your batteries are likely on their last legs.
Short Cycling
Short cycling occurs when your HVAC system turns on and off rapidly without ever reaching the set temperature. This is incredibly hard on your equipment and can lead to a Heating Repair earlier than expected. While a dirty air filter is a common cause, a faulty thermostat sensor or poor placement can also trigger this behavior.
Temperature Mismatch
Does the room feel like a “polar parlor” even though the thermostat insists it’s 74°F? When the reported temperature doesn’t match reality, your thermostat may have drifted out of calibration or is being influenced by “ghost” heat sources like direct sunlight. If you notice these Signs You Need Heating Repair In Poway, it’s time to investigate the wall unit.
Unresponsive Buttons or System
If you press the buttons or turn the dial and nothing happens, the “brain” is no longer sending signals. This communication breakdown often means the internal relays are failing or the wiring has become oxidized.
How to check your thermostat before calling for repair: The Essential Power Audit
Power issues are the number one reason for thermostat “failures.” Even if your thermostat is hardwired, it often relies on a 24V transformer or a battery backup to maintain settings during a surge.
How to check your thermostat before calling for repair when the screen is blank
If the screen is dark, start with the batteries. We recommend using high-quality lithium batteries rather than standard alkaline ones. Lithium batteries provide a more consistent voltage, which is vital for the electronic relays inside modern thermostats.
Next, check your electrical panel. A tripped circuit breaker is a frequent culprit, especially after a San Diego thunderstorm. The thermostat is usually tied to the indoor furnace or air handler breaker, not the outdoor AC unit.
Finally, check for the “secret” furnace switch. This often looks like a standard light switch located near your furnace or in a nearby closet. If it was accidentally flipped off while moving boxes or holiday decorations, your system won’t have the power it needs to respond to the thermostat. Learning how to fix a heating system that won’t turn on starts with these basic power checks.
Verifying mode and fan settings
It sounds simple, but you’d be surprised how often a “broken” heater is actually just set to “Cool” or “Off.”
- The 5-Degree Rule: To test if the thermostat is communicating, set the heat 5 degrees above the current room temperature (or 5 degrees below for cooling). You should hear a distinct “click” from the thermostat followed shortly by the sound of the furnace or AC engaging.
- Fan Settings: If your fan won’t stop blowing, check if it’s set to “On” instead of “Auto.” The “On” setting runs the fan 24/7, regardless of whether the system is heating or cooling. Switching to “Auto” ensures the fan only runs during a cycle, saving energy and reducing wear. For more on optimizing these settings, check our heating service guide.
Physical Maintenance and Calibration Procedures
Dust is the natural enemy of precision electronics. Over time, “mischievous dust bunnies” can settle on the sensors inside your thermostat, causing it to misread the room temperature.
How to check your thermostat before calling for repair for calibration issues
Calibration drift can cause a thermostat to be off by 2 to 5 degrees, leading to high energy bills and discomfort. To test this, tape a separate digital thermometer to the wall about an inch away from your thermostat. Wait 15 to 30 minutes for the temperature to stabilize.
If the readings differ by more than 2 degrees, your thermostat needs recalibrating. On older mechanical models, this might involve adjusting a calibration screw. On modern digital models, you can often find a “Sensor Offset” or “Temperature Offset” in the settings menu to manually correct the reading. If calibration fails to stick, it might be time for a heating replacement.
Cleaning and debris removal
If you have an older mechanical thermostat with bimetallic coils or a mercury switch, cleaning is essential.
- Remove the cover: Most covers snap off or are held by a small screw.
- Use compressed air: Blow out any dust or lint accumulation.
- Use a soft brush: A small artist’s brush or a Q-tip dipped in rubbing alcohol can gently clean metal contacts.
- Avoid liquids: Never spray cleaners directly into a digital or smart thermostat.
For a deeper dive into maintaining your entire system, see our heating repair complete guide.
Testing System Communication and Wiring
If power and settings are fine, the issue may be the physical wires connecting the “brain” to the “body.”
| Terminal Label | Function | Typical Wire Color |
|---|---|---|
| R | 24V Power | Red |
| W | Heating | White |
| Y | Cooling | Yellow |
| G | Fan | Green |
| C | Common (Continuous Power) | Blue/Black |
Safety First: Always turn off the power at the circuit breaker before inspecting wires.
- The Smartphone Trick: Before you touch anything, take a clear photo of the wiring. This ensures you know exactly where every colored wire belongs if one slips out.
- Check for Oxidation: Look for wires that look “crusty” or green. This is corrosion (oxidation) and it prevents electrical signals from passing through. You may need to strip the wire back to expose fresh copper.
- Tighten Terminal Screws: Vibrations over the years can loosen the tiny screws holding the wires in place. Give them a gentle snug with a screwdriver.
- The Jumper Test (Advanced): By joining the R (power) and W (heat) wires together with a small jumper wire, you can bypass the thermostat entirely. If the furnace kicks on, you’ve proven the thermostat is the problem. If it doesn’t, the issue lies with the furnace itself. When DIY tests reach this level, many homeowners prefer choosing us for heating repair in Poway to ensure the job is done safely.
For more technical support, our HVAC service in Poway is always available to help diagnose complex wiring faults.
When to Consider a Professional Upgrade
Even with the best care, thermostats don’t last forever. Most digital and programmable models have a lifespan of about 10 to 12 years. If yours is older than that, or if you find yourself troubleshooting it every season, it’s likely time for an upgrade.
The Benefits of Smart Thermostats
In 2026, smart thermostats have become the gold standard for home comfort. Beyond just remote control via your smartphone, they offer:
- Energy Savings: Certified smart thermostats can reduce heating runtime by 8% and cooling runtime by 10%.
- Geofencing: Your system can detect when your phone enters a set radius of your home (like when you’re driving back from San Diego) and start warming or cooling the house so it’s perfect when you walk in.
- Remote Diagnostics: Some models can alert us to system faults before you even notice a change in temperature.
If you’re wondering if a heating replacement is necessary in Poway, starting with a thermostat upgrade is often the most cost-effective first step. Follow our steps for heating replacement to see how a new control unit fits into your home’s long-term efficiency plan.
Frequently Asked Questions about Thermostat Troubleshooting
How often should I replace my thermostat batteries?
We recommend replacing them once a year. A great way to remember is to do it at the same time you change your smoke detector batteries. Even if the screen isn’t blank, weak batteries can cause the internal relays to stick, leading to erratic system behavior.
Does the location of my thermostat affect its performance?
Absolutely. A thermostat should be mounted on an interior wall, away from direct sunlight, drafty windows, or heat-producing appliances like ovens or lamps. If it’s in a drafty hallway, it will think the house is colder than it is; if it’s in the sun, it will think it’s a sauna. Ideally, it should be mounted at shoulder height (about 5 feet) for the most accurate average reading.
What is the difference between “Auto” and “On” fan settings?
“Auto” means the fan only runs when the system is actively heating or cooling. This is the most energy-efficient setting. “On” means the fan runs continuously. While “On” provides better air filtration and prevents hot/cold spots, it increases energy consumption and leads to faster blower motor wear. Most homeowners find “Auto” to be the best balance.
Conclusion
How to check your thermostat before calling for repair is a skill every homeowner should have. By running through a quick power audit, verifying your settings, and keeping the sensors clean, you can often solve comfort issues without spending a dime.
However, if you’ve replaced the batteries, checked the breakers, and verified the wiring, and your home still feels like a “polar parlor,” it’s time to bring in the experts. At Hans Energy Systems, we pride ourselves on providing reliable, quick, and exceptional service to our neighbors in Poway and throughout the San Diego area. Whether you need a simple calibration or a full AC repair, we’re here to ensure your home remains the comfortable sanctuary it’s meant to be.
Don’t let a faulty thermostat disrupt your peace of mind. Give us a call today, and let’s get your home’s command center back in top shape!